
Create a Ride
Pick public or private, set the day, time and meeting point, choose a mapped route or freeride, and share your new ride.
You lead. Create a ride, tell everyone where and when to meet, and OnMyLead gives you a link, a code and a QR code to share. Public rides show up for riders nearby. Private rides are only for the people you invite.
Create Your Ride
- On the Rides tab, tap Create a Ride.
- Under What Kind of Ride?, tap Public (open to anyone, found by riders near you or in your state) or Private (only friends you invite by link, text or email).
- Type a Ride Name.
- Under When, pick the day (see Pick the Day below).
- Set the time in Meet At (see Pick the Time below).
- Set the Meeting Point. You can search in Search a Place or Address, tap Use My Current Location, or paste Coordinates like "38.57, -109.55".
- Add a Place Name if you like, such as "Gas station on Main St".
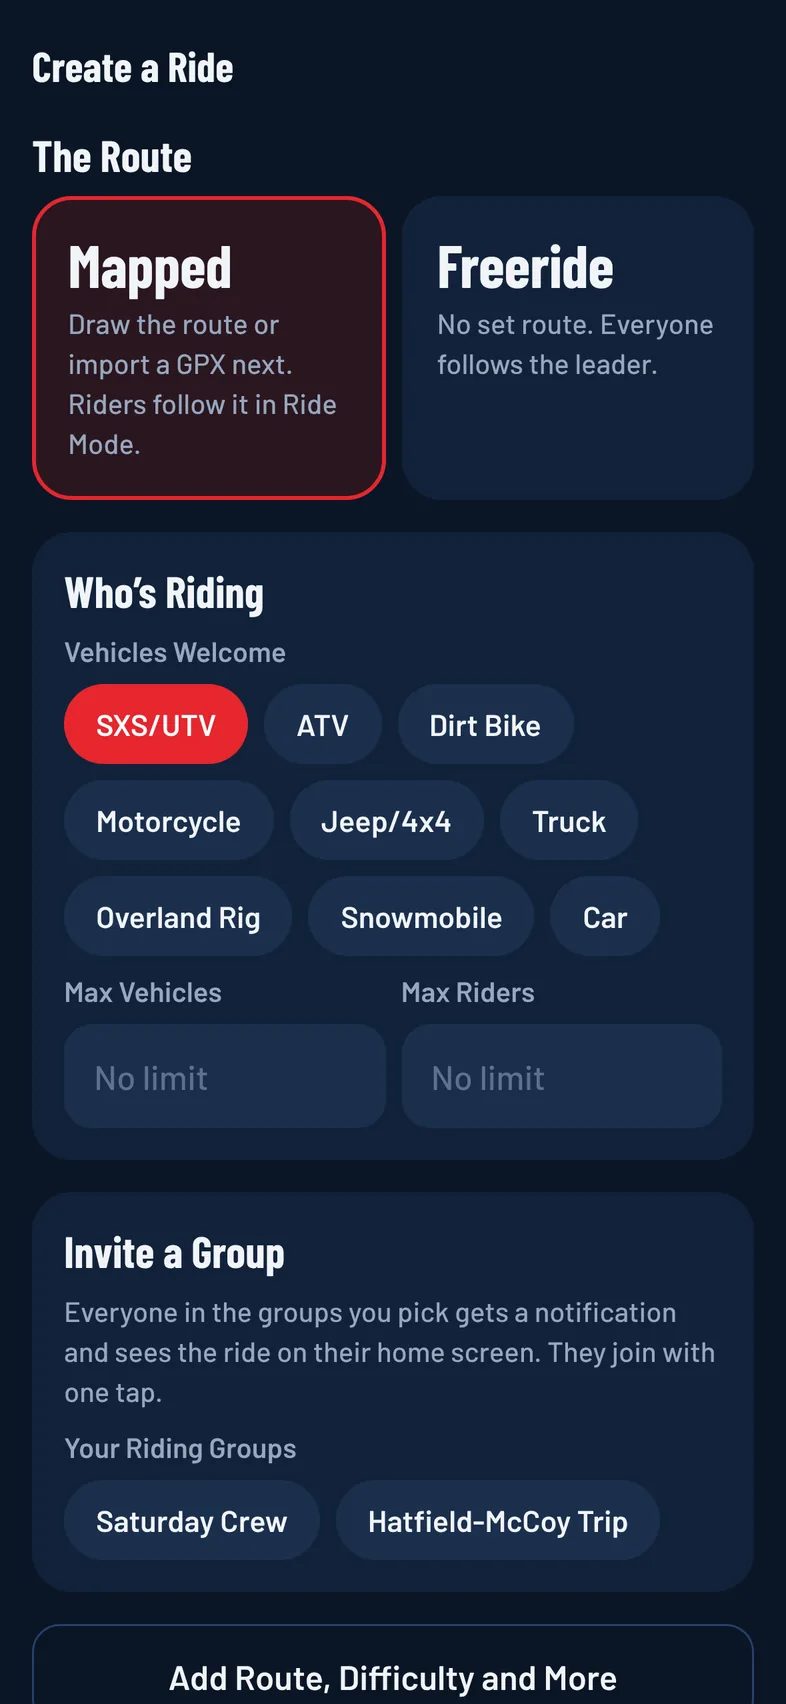
- Under The Route, tap Mapped (you draw the route or import a GPX file next) or Freeride (no set route, everyone follows the leader).
- Under Who's Riding, pick the Vehicles Welcome.
- Tap Create Public Ride or Create Private Ride.
If you picked Mapped, the route builder opens right away so you can draw the trail. See Build a Route. Once the ride is saved you land on its page, ready to invite riders.
Pick the Day
Under When, tap Today, Tomorrow or any day in the next two weeks.
Public Ride Options
A public ride is listed in its state so riders can find it. The State fills in from the meeting point. If it's wrong (it can happen near a border), tap Change State and pick the right one.
Public rides also have a Joining choice:
- Anyone Can Join
- I Approve Riders
See Approvals and the Waitlist for how requests work. Private rides don't have this choice: anyone holding your invite link or code can join.
Limit Who Can Come
Under Who's Riding, set Max Vehicles, Max Riders or both. Leave them empty for no limit. When the ride is full, new riders go on a waitlist. See Approvals and the Waitlist.
Invite a Riding Group
If you're in a riding group, an Invite a Group section shows up. Pick one or more groups under Your Riding Groups. Everyone in them gets a notification and sees the ride on their Rides tab, and they join with one tap. See Riding Groups.
Add More Details
Tap Add Route, Difficulty and More to fill in any of these:
- Description
- Departure Time and Expected Finish (used to check your ride against sunset, see Ride Day and Weather)
- Destination, which anyone who can see the ride sees, with directions in Apple Maps or Google Maps
- Route Length (Miles), used to warn riders whose fuel range is too short (see Fuel Range)
- Difficulty: Easy, Moderate, Hard or Extreme
- Experience: Beginner, Intermediate, Advanced or Expert
- What to Bring, Required Equipment and Fuel
- Instructions for Joined Riders, which only riders on the ride see
- Ride Bubble: Standard, Tight Trail, Desert or Highway (see Ride Bubble)
After You Create It
Your ride page opens with a card that has the invite code, a QR code and buttons to share it. See Invite Riders. You're also the ride's organizer and leader. See Organizer Controls.
How Many Rides You Can Create
Free accounts create one ride each month. Joining rides is always free and unlimited. On Free, the top of the Create a Ride screen shows Rides Created This Month so you know where you stand. When you've used this month's free ride, the app tells you the date your next one opens (the first of the month, UTC). Creating more rides than that is a Pro feature. See Free and Pro.
Pro bought on Android through Google Play lifts the monthly limit the same way, on every device you sign in to.